|
I discussed previously how you might archive your photos from your memory
card when you are out in the field or at home. Hopefully, you didnt have too many images that you had to throw
away.
Switching to digital has given us the instant gratification of seeing our images and being able to correct any mistakes on the spot.
So, how do we do more photography and spend less time at the computer?
Rule 1 - do not rely on your LCD screen do not trust what you see, especially if you are diving at any depth.
The screen is designed for topside use and it will make you believe that your shot is bright and beautiful.
You will be so mad when your images turn up dull and muddy because you relied on your monitor. For underwater use, you might
want to turn the display brightness down a few notches.
Rule 2 I also do not trust my camera meter. For someone that comes from a film background that is a tough one. You need to
rely on your histogram, and I also use the highlight warning to ensure that my images are exposed properly.
Those white blinkies immediately identify any areas of the image that are overexposed and blown out. Digital has a problem
with poor detail in the uppermost highlights. This gives you the opportunity to darken your exposure. However, be careful about
darkening too much- a few highlights are ok- as having pure white in your images will ensure better tonal range and contrast. On
subjects that do have white on them, you still want to see some texture on land, texture in white feathers of a bird, or underwater,
the scales of a fish should not be blown out.
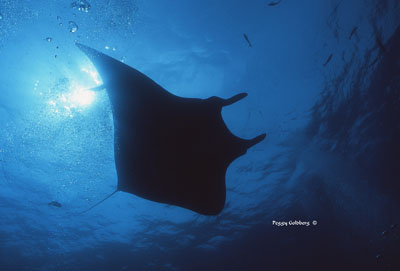
Underwater, we tend to shoot into the sun, which will always blink back at us- and in toning it down, you still want to have some
part of the image flashing back at us for maximum image quality and contrast.
I set my LCD screen to show the histogram- check your cameras manual to see how to display yours with the image.

The histogram is just a graph that shows pure white on the right, and pure black on the left, with everything else in between.
Do not worry about the shape of the histogram- whatever it is, it is normal for that image, and will be different for each one..
Worry about the right side edge. That represents your highlights! If your exposures are brighter, then they will shift the histogram
to the right, and if they are darker, they will shift the histogram to the left. Especially for your underwater shots, you will want
to shift the histogram as far to the right as possible, making your image as bright as possible, without any spikes at the edge. Any
spikes on the edge means that your highlight detail wont be there. (And you will notice your highlight blinky warning on your
screen.)
If you think you can shoot your exposures darker and fix them in Photoshop later go for it but your images will not be optimum,
with greater noise and lower quality. Why would you want to spend time at the computer fixing something that you can do correctly in
the camera? The way the cameras are designed, they record the majority of the tonal values from the middle of the histogram to the
right- thus, giving your image more tonal range, especially in RAW. If you expose to the left of the histogram, your tonal range is
much smaller, and your images will never look as good or clean as those exposed to the right.
For those of you that want to go a little further, in the next article, I will discuss how to use the RGB histograms that can be
displayed by late model SLRs
great for underwater photography!
Now go practice exposing to the right!
|